Ta dah - my homage to the new series of Downton Abbey - a little baking pun on the Upstairs Downstairs nature of this so dearly beloved series - the downstairs for the servants (of whom I would have been one back in that day) is a dense jam roly poly, hard working and fortifying, made more refined with the addition of peach lavender jam instead of the usual raspberry - peach for the peaches and cream complexions of the Crawley Girls and lavender because it is such a British herb - the upstairs part of the pudding is Queen of Puddings, light and airy, delicate and demure - subtle lemony custard, sublime meringue and I've added some whipped cream to the mix because - honestly - it made the pudding look just that much better - what ugliness we can hide with whipped cream and a piping bag - and it also then ended up having the sense too of an Eton Mess - which makes the upper crust VERY upper crust - say what?
I am using blue type for the blue blood of the aristocracy :)
You may or may not want to have the lavender part in your pudding - it added a very subtle hint in the amount and way I used it but some people think it's a soapy taste and if you are one of their number you should leave this part out - it will not deter from the final deliciousness.
As ever read through the recipe first as there are a number of methods and multiple steps.
LAVENDER SIMPLE SYRUP:
1/2 cup water
1 cup sugar
1 1/2 tablespoon of food grade lavender flowers.
1. Heat 3 ingredients to boiling, take off the heat, allow to soak about 5 minutes and then strain out the flowers and allow to cool. You can use this in cocktails, lemonade, other recipes. It will keep quite well stored in a jar in the fridge.
You can also buy Peach Lavender jam from my friend Wendy at Sunchowder
I use weights for my recipes and here some reasoning why from KING ARTHUR FLOUR
You can also buy Peach Lavender jam from my friend Wendy at Sunchowder
I use weights for my recipes and here some reasoning why from KING ARTHUR FLOUR
Now for the Jam Roly Poly:
Jam Roly Poly is a stodgy
glory of a pudding - 'stodgy' being the British word for
stick-to-your-ribs, heavy, filling comfort food that is usually very
high in the carb department...this one fits the bill big time!! - it is nursery food of the highest
order and one of those war time type puddings where the merry wives of
England attempted to make something delicious out of almost nothing!!
THE RECIPE:
4 oz unbleached white flour
2oz very cold butter OR shredded suet if you can find it - although of course that makes it non-vegetarian - I used butter because I wanted to see how it came out - Mrs. Patmore would be appalled as she would always use suet which lightens the pudding and would have been a very normal ingredient in so many puddings of her day.
2 tablespoons sugar
Good pinch of salt
4-6 tablespoons cold water
3 big tablespoons of warmed JAM.....I used Bonne Maman Peach with 3 teaspoons of the lavender syrup added (Bonne Maman is a very clever company who advocates the recycling of their jars in their European advertising - immensely clever concept) - you may use strawberry or raspberry jam which is traditional.
3 big tablespoons of warmed JAM.....I used Bonne Maman Peach with 3 teaspoons of the lavender syrup added (Bonne Maman is a very clever company who advocates the recycling of their jars in their European advertising - immensely clever concept) - you may use strawberry or raspberry jam which is traditional.
A little milk for brushing
METHOD:
1. Rub the shredded suet or grated very cold butter into the flour along with the sugar and salt.
2. Add water spoon by spoon until the dough sticks together but is not sticky.
3. Turn dough onto a floured board and roll out to about 4" by 8" rectangle.
4. Spread chosen jam over dough but keep 3/4" clear of all the edges.
5. Fold over long edges and press lightly down...the object is to prevent the jam escaping when you roll the roly poly up...see pic below...

6. Brush milk on to turned over edges and start to gingerly roll up the poly being careful to seal the edges as you go but not squeeze the jam out either.
7. Here's how your poly should look...like a great big sausage roll...no jam escaping here!
7. Here's how your poly should look...like a great big sausage roll...no jam escaping here!

...seal well you don't want get that roll soggy!! Sprinkle with sugar and wrap up in a layer of parchment and then a layer of aluminium foil.
8. Now put the wrapped sausagey thing into the top of a steamer and steam the living daylights out of it for about 1 1/2 hours...thus..

9. This is unusual but I took the roly poly out of it's wrapping, sprinkled it with more sugar and then baked it in a 400F oven for about 15 minutes to dry and crisp the exterior...as below. And there you have your Jam Roly Poly...not the most exciting of desserts, sorry puddings, not the most elegant...a humble little pud that is oh so very traditional...I had it for pudding at school!!

Whilst ye olde jam roly poly is steaming you can make the beginning of the custard and also the wonderful almond meringues - I was going to do plain meringues at first and then veered towards almond as I am a lover of that flavour and I thought it would be a nice foil to the peach.

CUSTARD for the pudding - taken from Mary Berry's beautiful recipe for Queen of Puddings:
INGREDIENTS:
20 fl oz whole milk
25g/1oz butter
1lemon zested
50g/2oz sugar
4 whole eggs whisked
METHOD:
1. Gently heat the milk.
2. Add butter, sugar and lemon zest and swish until melted.
3. Gently pour the warmed milk mix into the whisked eggs, whisking as you do so so they don't get a chance to cook or curdle and blend well - set aside to cool and use later.
Heat the oven to 325F, have some hot water ready for a bain marie/water bath (and if we were watching Call the Midwife the possibility of a baby being born) and a roasting tin large enough to hold your chosen pudding dish.
Take your jam roly poly out of the steamer after its 1 1/2 hours sauna - unwrap, allow to cool.
When cold slice into 1/2 inch slices and arrange in the bottom of a heat proof, shallow preferably oval (because that's more elegant and the Lady Violet will appreciate it) dish thus in the background - foreground showing you what the sliced roly poly should look like:

Now pour your lovely cold custard over the sliced roly poly:

Pop the little darling into your bain marie - I had a small dish (I did two separate dishes - one for me one for James) and used a cake tin for my water bath:

Now off into the oven for about 20-25 minutes - allow the centre to be just a tad wiggly and the custard will be just perfectly set thus:

Allow to cool.
Now make some divine meringues with a lovely almond flavour that taste like heavenly amaretti biscuits!!
METHOD:
1. Toast 1 oz of whole almonds with the skin on for about 15 minutes i a 325F oven.
2. Allow to cool completely.
3. Put into a plastic bag and hit with a hard object to break into small pieces THEN grind in a coffee grinder until fine but not oily.
The Meringues:
Try
to make on a dry day - humidity and thunderstorms can either effect the
consistency of the beaten eggs or make them curdle - so the dryer the
day the better.
Set the oven at 250F – nice and low. Cover your baking
tray with a sheet of parchment or greaseproof paper – no need to grease the
paper.
INGREDIENTS:
2 egg whites at room temperature
4
ozs sugar...fine if don't want your meringues to be gritty - mine were a
bit gritty because I use organic sugar from the Belfast Coop and it
doesn't come in fine - and I am OK with a little grittiness in my
meringues
1/2 teaspoon of vinegar
1/2 teaspoon of almond extract
1oz toasted almonds

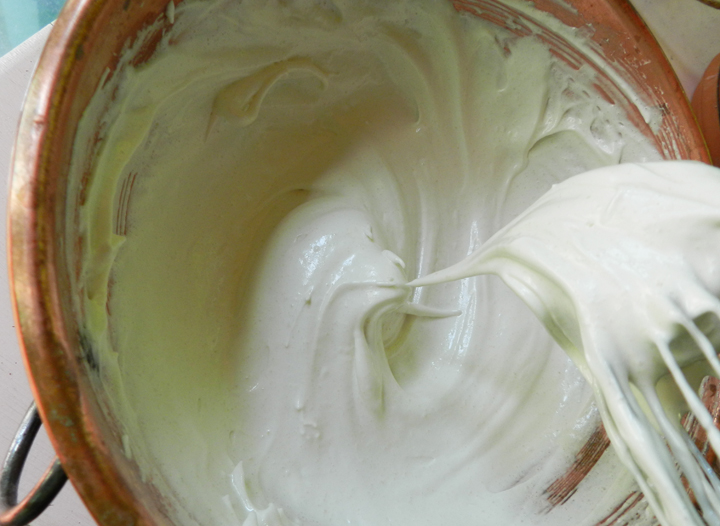
1. Whip the egg whites until stiff
2. Add sugar 2 tablespoons at a time
and whip, whip, whip until all the sugar has been added and the result is
glossy and dense and divine.
3. Mix vinegar and almond extract and almonds together
in a small bowl and then gently fold into the egg white and sugar confection.
4. Pile
dollops of meringue or pipe meringue onto
parchment.
5. Bake in a 250F oven for about an hour and a half then turn oven off and leave meringues in there to cool - this is for a meringue that still has some softness and chew in the centre - if, like me, you prefer a meringue that is like ceramic (and yes I know that is not fashionable because of French macaron everyone wants a bit of chew) then you can cook for another hour making sure that they do not brown - so check on them occasionally.

BTW Mrs. Patmore would be appalled that the meringues are not pristinely white as that was the aim back then and really until recently - maybe until me - to have them as white as possible - naughty moi!!
Now for the assemblage: Warm a few more tablespoons of chosen jam and spread over the cooled custards - remove meringues carefully from the parchment paper and dot over:

Now decide that you don't like the way this looks and whip up some cream, with a teaspoon of the lavender simple syrup if your heart so desires and some sugar to taste and pipe that over your puddings so they look much prettier:
I do hope you enjoy this seasons Downton Abbey - I have heard wonderful things about it from my sister and friends in England - do let me know if you make this pudding and please feel free to share your pictures on my Facebook page HERE.
My apologies for the type and spacing being all over the place - blogspot is having one of THOSE evenings where it just won't behave - Lady Violet will have something to say about that won't she!!
My apologies for the type and spacing being all over the place - blogspot is having one of THOSE evenings where it just won't behave - Lady Violet will have something to say about that won't she!!
Thanks!!!

I thought you might enjoy this picture of our recently adopted kitty Sasha who has decided she prefers the inside of the pillow to the cover and has made herself a nest therein which she seems to delight in daily - go Sasha!!