Showing posts with label currants. Show all posts

Sunday, June 29, 2014

Eccles Cakes perfected - my they're good!

 Ahhhh - a picture of my perfected Eccles Cakes which went through a variety of stages before ending up like this crumbly luscious raisin studded delight you see glowing happily above. My first attempt was on a way too hot and humid day where I added just a tad too much water to the dough, for indeed one needs so much less water in one's pastry on such a day, and I didn't keep my pastry cool so it was a very soft texture thus instead of attaining said Eccles Cakes, and no they are not actually what one would think of as a cake but more of a self contained mince pie - but I digress - I ended up with Eccles Biscuits/Cookies:
...which tasted great but were not what I had in mind. SO I thought I have all these amazing strawberries....

 ...with many more to come from our neighbour - I should make strawberry biscuits/cookies like my failed Eccles Cakes - and so I made them on a less humid and hot day and guess what - I ended up with Strawberry Eccles Cakes - ha ha!!!
James loves "water icing" drizzle so I doused them with said delight and they were very, very good. The recipe for them is the same as that below for the actual Eccles Cakes but instead of the raisiny mix you macerate strawberries in sugar until soft and having given up a lot of their juices strain them - use the resultant juice for a nice refreshing drink, perhaps watered down some, and also use the juice to rub on the 'cakes' thus before baking before the necessary sprinkling of sugar!

SO - to the recipe - I have not made pastry with spelt flour until very recently and now I am a convert - it crumblified and toothified the pastry to a divine extent and I am not sure I will ever make all white flour pastry again:

 THE FANTASTIC PASTRY:
3ozs white flour and 3 ozs regular spelt flour (the brown not the white) mixed together - 3/4 cup each
(the addition of brown spelt flour makes the pastry more sandy/crumbly delicious but you can use all white to very good effect also)

1oz/ 1/8 cup sugar

4 oz/ 1 stick very cold salted butter

1/8 to 1/4 cup - a few liquid ounces of very cold water

1. Put flours in a mixing bowl and grate very cold butter on top - I am not a technical baker but have read the grating is integral to achieving a wondrous texture in your pastry)  - if you keep dipping the chunks of cold butter into the flour to coat it will be easier to grate
2. Rub butter into flours until it looks like breadcrumbs (you can do this in a cuisinart but I like to do everything by hand)
3. Add some of the water and start squushing the pastry and keep adding bit by bit of water until it can be formed into a non-sticky ball - less water is better so squush hard until it comes together: 

5. Put into the fridge to rest for at least one hour - or as long as you like. 

Now to the yummy filling:
First make some hot tea to soak the raisin and currants in - you'll need about 8 fl ozs/one cup - good and strong and soak them for about 2 hours
1 1/2 ozs/about 1/4 cup each of currants and raisins
soaked in hot tea for 2 hours and drained

if you can't get GS do 3 ounces total of sugar but GS makes the cakes sing!!

1oz/ 1/8 cup sugar 

1 1/2 ozs/ 3 tablespoons salted butter 

1/2 teaspoon each of nutmeg and cardamom
NB Many recipes add lemon zest or candied lemon peel but I preferred mine without - of course you may add it to yours!

1. Put all these ingredients in a pan and melt til bubbly and stir frequently until juices/butter has thickened. 

2. Allow to cool. 

3. Strain the above and save the sauce - which also tastes great on it's own!!
YOU CAN PUT YOUR OVEN ON NOW TO 400F
4. Roll out the dough nice and thin and cut into 4 inch rounds - I got 9 out of mine after rerolling the scraps a couple of times.

5. Dollop about a good teaspoon of currant goodness in the middle, it doesn't sound like much but it works and if you do more you can't close the cakes, and dot saved sauce around the edges to help stick the cakes together.
6. Fold the dough over the filling thus - all the way round and then squush and squish as necessary to make sure there are no holes on the bottom for the juices to leak out, this pictures a less juicy example but you may experience the juices running out - don't worry everything will be fine, you just get sticky hands!! - beauty is not an important aspect of the cakes at this point - or any really!!
7. When it's all battened down the bottom of the cake should look like this:
8. Turn it over and flatten a little and very gently between your palms then place on a parchment sheet on your baking tray.
The slits on these Eccles Cakes are too long - make sure yours are shorter!
9. Now cut two SHORT slits in the top of each Eccles Cake - I realized too late my cuts were mostly too long and they made the cakes open up too much so maybe only about 1 inch long.
10. Spread some of the leftover sauce on the tops - this will help achieve the lovely browning on the tops - and then sprinkle with sugar before bobbing into the oven for about 20 minutes until golden brown and lovely:
These slits on the top of these 3 were perfect!

OH MY GOODNESS - these are so good - I poured any leftover sauce in the slits when the cakes were still hot to make them even more juicy.

Allow to cool before you enjoy them with your feet up, a nice cuppa in hand and a good read of the latest British Country Living in your near future!!
 
I do hope you make these and if you do please post pics and comments on my Facebook page HERE - thanks!

Next up on the blog is a whole bunch o' new designs at my Spoonflower and Society6 online shops so please stay tuned!!

Happy Baking from Patricia
Follow on Bloglovin

Wednesday, April 4, 2012

Hot Cross Bun Bread and Butter Pudding for Easter 2012

I have to be honest and admit I am not that big of a fan of Bread and Butter Puddings - I have made them on a number of occasions and have only once really liked the results but this particular Bread and Butter Pudding is a winner - it is soft, pillowy and luscious with an intriguing spicy overtone. I made the Hot Cross Buns from scratch instead of buying them but you could so easily use store bought and take the hardest and most time consuming part out of the equation. I did make Hot Cross Buns about three years ago here on the blog - then they turned out like little bricks - this time I had to make them twice - first time they burnt on the bottom with a specific Hot Cross Bun recipe to remain nameless:
These weren't bad taste wise but they too were a little hard and oh those burnt bun buns!!
Next I tried a sticky bun recipe that has been very successful for me - the bottoms were quite well done but not burnt - yea!!! - and the buns came out very favourful and a nice texture but a totally different texture to when I use this dough for sticky buns apparently so because spice retards and changes the yeast processing - which it most certainly did - here is the second crop of Hot Cross Buns:
So here we go if you want to make your own
HOT CROSS BUNS
This made 9 small buns but you can easily double the recipe if you want more.

FIRST make the 'sponge':
1/2 tablespoon of yeast (I use bulk yeast from the Belfast Coop - if you use packet yeast like Fleischmann's that would be 1 packet)
1/2 teaspoon of honey or maple syrup
3 fluid ounces/80mls warm milk - warm almost hot to the touch

Mix these 3 ingredients in a small warm bowl and leave in a warm place for about 10 minutes until thick, bubbly and creamy as below:
FOR THE DOUGH:
8oz/250g plain flour
1 large egg well beaten
1oz/28g sugar
2oz/50g softened butter - always Kate's for me!!
1/2 teaspoon of mixed spice - I actually used garam masala which is a delicious Indian spice I have started using in raisiny recipes after reading that Deeba at Passionate About Baking used it in her Christmas cakes - it is delicious!
1/2 teaspoon freshly grated nutmeg - I LOVE nutmeg

1.Sieve flour into a large mixing bowl, add sugar and stir in, add spices and stir in.
2. Make a well in the middle of the mix and pour in the warm yeasten mix:
 3. Add beaten egg and softened butter also and mix well together.
4. When the mix has come together put onto a lightly floured surface and knead for about 5 minutes until smooth and elastic.
5. Put dough ball into a clean bowl, cover with a clean tea towel and place in a toasty warm spot for about 1 1/2 hours until the ball has doubled in size - this is hard to judge but if your room is warm (70Fish) it should be just right at 1 1/2 hours:
IN THE LAST 10 MINUTES OR SO OF THE DOUGH RISING make the crosses - do not make them any earlier as they will dry out and be hard to use (yes I did this and they didn't work well):
Put 4 fluid ounces/125mls of cold water into a small bowl - add a big tablespoon of flour, mix, add another tablespoon and mix and continue until maybe four when the paste should be nice and thick - turn it onto a smooth surface and work a little with more flour until you get a nice smooth dough - roll out to a rectangle about 4 x 10" and then cut this into 18 strips - 2 for each bun:
Now uncover your dough and tear into about 9 even pieces and roll into balls and place evenly spaced on two buttered baking sheets - I think part of my problem with burning the first batch was not only the recipe but I used a dark baking sheet so with the second batch I covered it in foil and I think that helped lack of burnt bottoms.
Place two pieces of the dough in a cross on the tops and push them down a little to hold them in place, cover them with clean tea towels and put back in a warm place to rise for about 30 minutes - now preheat your oven to 350F/180C.

Bob your buns in the oven and bake for about 30-40 minutes until browned on the top - mine stayed kind of blond and I decided to take them out at 35 which was a good decision.

Whilst they are baking put 4 fluid ounces/125mls of water and 2 ounces/50g sugar together in a pan with 1/2 teaspoon mixed spice (or garam masala) and 1/2 teaspoon nutmeg and warm until it bubbles and gets somewhat thick. Take off the heat and wait for the buns to come out of the oven.

When you take the buns out leave them to cool for about 5 minutes and then brush the sugar/spice syrup over them. Allow buns to cool and save 5 of them to make the pudding - eat the rest cut in half and slathered with butter with a nice cup of tea.

FOR THE PUDDING: 
5 Hot Cross Buns
4oz butter softened
2oz/50g dark chocolate - chips or slab chopped
2oz/50g currants

For the custard:
8 fluid ounces/250ml whole milk
3 fluid ounces/100ml heavy/double cream
3 oz/75g sugar
4 egg yolks from gorgeous Farmetta Farm eggs
1 teaspoon vanilla extract/essence

1. Pre heat oven to 300F/150C
2. Cut Hot Cross Buns laterally into halves - or I did thirds so I could get more butter in the pudding - butter one surface of each piece.
3. Arrange half of the slices overlapping in the bottom of a glass dish about 20cm/8" square.
4. Sprinkle with half of the currants and chocolate chips.
5. Arrange remaining slices over and sprinkle with the rest of the currants and chocolate chips.
6. I dotted some more pieces of butter over the top.

NOW MAKE THE CUSTARD:
1. Heat milk and cream together in a pot until just about to boil.
2. Stir in vanilla and allow to cool slightly.
3. Whisk egg yolks with sugar.
4. Slowly drizzle the hottish milk into the egg yolks and sugar and whisk all the time so the eggs don't curdle.
5. Return all of mix to the pan and cook on low heat until slightly thickned - stir all the time.
6. Take off the heat, allow to cool slightly then pour over the arranged Hot Cross Buns and allow to soak a little - press down until the custard is soaking in.

7. Put the glass dish into a larger metal pan - pour in hot water up to half the height of the glass dish and the put into the oven to bake for about 35 minutes.
 Take out of the oven et voila - a delicious creamy, yummy soft and pillowly dessert for this years Easter Festivities - I have to admit I wasn't sure about the addition of the chocolate but it really adds a nice richness and after all isn't Easter all bout chocolate??.

Happy Baking - let me know how you do - Patricia

Sunday, January 23, 2011

Kentish Pudding for National Pie Day!!....huh??

This is Kentish Pudding...and yes it is a pie or tart, it's one of those English colloquial anomalies that continue to confuse us all but rest assured it is quiet, simply elegant and most delicious!
This recipe is from Yorkshire TV's "Farmhouse Kitchen 2" and is attributed to Mrs. M. White and Mrs. Sue Marshall of St. Michale's, Tenterden, Kent...thank you ladies!!

My formatting is being VERY strange today so I apologize for the odd spacing...blogger doesn't want to let me change it, I have tried a couple of times and have now accepted my odd layout...apologies readers.
 
EASY PEASY SWEET TART CRUST:
Enough for one tart case about 9” diameter…nice and thin,
I am not a chunky crust personage so if you like a thicker pie crust make this for a smaller diameter pan:

1 1/2 cups/6ozs of unbleached white flour
1/2 cup/2ozs confectioners/icing sugar
1 stick + 1 tablespoon/ 4 1/2ozs butter VERY COLD
1 large egg yolk
a tad of milk or cream if your dough doesn't stick together

1. Sift dry ingredients together into a medium sized bowl.
2. Grate the butter into the dry ingreds., and rub in until like breadcrumbs.
3. Add egg yolk and blend carefully until the dough sticks together
4. Mine didn't stick together with just the egg yolk so I added baby drop by baby drop some cream until it did start to come together...be careful once it does start to come together it does so quite quickly...don't let it get sticky!!
5.Tear dough into big chunks…..place strategically in pie pan and start squushing to a create a smooth even covering of the entire pan…
The beauty of this crust is that it does NOT shrink at all…it stays put…good crust!!...and it tastes like a really good shortbread…yum!!

I did not pre-bake the crust but you can use a pre-baked crust if you are short on time...in which case the baking time will probably be quite a bit less maybe 20 minutes
so keep your eyes peeled on the pie.


Have your oven heated to 350F

FILLING:

1oz/scant ¼ cup ground rice…I found Fiddlers Green Brown Rice flour in bulk

at the Belfast Coop so I got a bit more fibre in there…just a bit

1/2pt/10US fluid ozs + I tablespoon milk or half and half (I used the latter as it

was the only thing in the fridge!)

11/2oz/ very scant 1/4 cup sugar

1/2oz/1 tablespoon butter

1 well beaten large whole egg

A grating of nutmeg (I like a lot of nutmeg)

About 2oz/ ½ cup currants

Pinch of salt


RECIPE:

1. Put ground rice in a bowl and slake with a couple of tablespoons of milk i.e.

mix it to a smooth paste.

2. Put remainder of milk (or ½ and ½), sugar and salt in a saucepan

and heat to boiling.

3. Pour a little of the boiling milk onto the rice paste, cream well and make

sure it is smooth, add a bit more and cream again and repeat until

finished and very smooth… I usually use a whisk for this instead of a spoon

which helps break up any attendant lumpage.

4. Return mix to pan and simmer gently for about 5 minutes..it will get

very thick and you need to stir it constantly again to prevent

lumpage and catchy burnage on the bottom.

5. Take off the heat and stir to cool for a couple of minutes,

then add the butter and blend well, then add the egg and nutmeg

and blend well.

6. Allow to cool to room temperature.

7. Strew the currants all over the base of the pie case (the recipe said to

strew them on the top of the pie but I have found if the currants

aren’t covered by the mix they can burn and that’s a taste I am not fond

of so I put them in the bottom instead…

not traditional but more to my own personal liking..…use as many or as few

as you like, I love currants and raisins so I covered the whole bottom

and actually would have liked more on reflection after eating the pie.

8. Pour the cooled rice mix over the currants.

9. Pop the pie pan onto a tray and off it goes into the oven.

10. I cooked the pie for about 35 minutes…it needs to be set and

slightly risen to be ready…it colours very little except on the air bubbles.

11. Remove from the oven and cool and EAT!!

Happy Pie Day everyone!!!
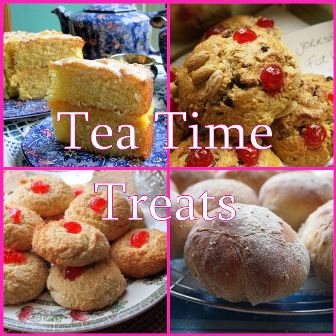
This Kentish Pudding is part of the Lavender and Lovage and Hedgecombers Tea Time Treats bloghop

Tea Time Treats Linky Party Logo

Happy Baking - if you try this recipe please let me know how it turns out and feel free to post pictures of such on my FACEBOOK PAGE - thanks, Patricia

Follow on Bloglovin

Saturday, October 11, 2008

Welsh cakes...again, not cakes....so what are they??


To be honest they are the stuff of legend...honeeest...they are the 'cakes' King Alfred burned, silly man!!!...actually I burned a couple myself so maybe he wasn't so silly!!! They are cakes in the same way a pancake is a cake, to me they taste like fried cookies (biscuits to the Brits reading)...they are sweet and cakey, simple and filling. I can eat them hot with or without butter and find them just as delicious cold when they really do have the sense of cookie about them.

The recipe I used is from an old copy of British Country Living and it has served me very well over the years...it's a great way to start your Thankies Day.

INGREDIENTS:
 
8oz unbleached white flour
 
pinch of salt
 
1/2 teaspoon freshly ground nutmeg ( I like just nutmeg, a highly underappreciated little spice, but traditionally one would do 1/2 tsp of mixed spice (?), is that allspice? and 1/2 teaspoon of mace)
 
4oz cold grated butter, makes it easier to blend into the flour (again in the recipe it asks for 2oz butter and 2oz of white fat but I don't have any lard and don't like hydrogenated fats...so I went for 4oz butter and they were just fine!)
 
3oz sugar...I use fine brown sugar because I like the flavour of brown but you can use white and King Alfred probably used white sugar...or did he...does anyone know what colour the sugar would have been then...maybe they didn't have white sugar in the 14Century...or whenever he lived, I am making an uneducated guess here!)
 
3oz dried currants
 
1 egg beaten...oops I left this out of the ingredients photo, with a tsp of vanilla extract stirred in
Approx. 1 tablespoon of milk.
 
THE PROCESS:
 
1. Sift flour, salt and spices together in a bowl.
 
2. Rub the grated butter in until it resembles breadcrumbs.
 
3. Stir in the sugar and dried fruit.
 
4. Add the beaten egg with a fork.. and just enough of the milk to form a soft dough...it should be a bit sticky.
 
5. Roll out the dough to 1/4" thickness and cut into rounds, or simple shapes. I got too clever for my clogs and used a star cutter and what with the currants they don't keep their shape well, although I still think they look nicely rustic. You may if you so desire omit the currants as I know so may people out there have fear of dried fruit pertaining to nightmare fruit cakes!...I think the recipe should come out just as well and then you can be more fancy with your cutters!
 
6. Heat up your frying pan, preferably a cast iron one, or griddle if you have one to medium heat. Grease with a little butter...remember they have a lot of butter already in them, and try ONE Welsh Cake to get the feel of the pan and heat, just like you would do with a pancake....the first one of which you usually throw away until your get your hand and the pan 'in'...if you know what I mean.
 
7. Cook the Welsh Cakes in small batches...don't crowd the pan, you want to make it easy to turn them over, and cook a few minutes each side until nicely browned but still soft in the middle.
 
8. Get them out of the pan, cut in half horizontally and put a nice pat of butter in there if you so desire. Maple syrup would be a nice addition if you want to gild the lily and do actually make them for Thankies.
 
9. Repeat process multiple times because once you start eating these little treasures, chances are you won't be able to stop.
 
Off you pop and warm up that big lumbering cast iron frying pan!!! Autumn is just the right time for Welsh Cakes...with, of course, a spot of tea...they do go better with tea than coffee.

Monday, August 25, 2008

Eccles Cakes!!


I grew up eating Eccles cakes which are not actually cakes but more like flattened mincemeat pies with less filling and more pastry...they are indeed a Northern English delicacy named after the town where they were first baked and their flavour is very reminiscent of a British Christmas. If you don't like dried fruit run away now! Traditionally Eccles cakes are made with flaky pastry but I was too lazy to try my hand at that and ended up using a lovely sweet shortcrust pastry recipe I found in one of my trusty old-fashioned English cookbooks. I have found a wonderful resource for conversion charts from UK to US measurements and also a list of Brit cookery names and terms used on the other side of the Pond at Sue Pallett's website, she has kindly allowed me to feature a link to the site on this blog...thank you Sue!
In the first picture above you see my balance weighing scales, without which I wouldn't be able to bake my British recipes, and the indispensible micro-plane that works like a dream for shaving the zest from lemons and oranges.
Here is the recipe:
SWEET SHORTCRUST PASTRY:
8oz unbleached flour
1/2 level teaspoon of salt
5oz butter that has been in the freezer for about 15 minutes
1 egg yolk
1oz fine/castor sugar
3 teaspoons of water
1. Mix the flour and salt in a mixing bowl...(is that why they call it a mixing bowl?)
2. Grate butter into the mix...coat the butter in flour before you grate it to make the process easy, then rub the grated butter into the flour until it resembles fine breadcrumbs...have you guessed by now I do all my baking by hand and don't use machines?...what a pure flower I am.
3. Mix together egg yolk, sugar and water in a seperate bowl...also a mixing bowl perchance?
4. Make a well in the middle of the butter/flour mix, add the liquid mix and blend gently to a firm dough.
As you all know you should keep your hands as cold as possible during the pastry making as pastry dough is very fussy and doesn't like warm hands and will not behave properly if it gets warm in any way!!!
Now the dough is tired and should be left to rest in the fridge until it regains it's strength ready for the next part of the process, a good 20 minutes in the fridge should do the trick.
THE ECCLES FILLING:
1/2lb of currants, sultanas, raisins mixed
2oz finely grated orange and lemon zest (I made the mistake of using chopped peel and my teeth haven't recovered yet, it doesn't soften well in this mix so use the real thing)
1/2 teaspoon grated nutmeg and allspice together
4oz any kind of sugar
2oz butter
1. Put all the above ingredients into a pan and warm through til butter melts then transfer to a bowl (a mixing bowl?) to cool.
2. Roll out pastry to less than 1/4" thick, I made mine too thick and the cakes were more pastry than filling and it should be the other way around.
3. Cut into 6', no no...6" rounds.
4. Place a good tablespoon of mix in centre, you'll know if you have put too much in 'cos the next step won't work so well...
5. Fold the excess up and over the filling...see above photo...and sqwush the edges til there are no escape holes for the filling to ooze from...this pastry is very malleable so this is easy to do.
6. Turn the 'cake' over and flatten slightly as picture above, slice three lines in the top of each cake to let the steam out whilst cooking or the little beggars will explode...explode may not be the right word but they may split...
7. Wash cakes with a little milk and sprinkle with sugar for fairy dust look.
8. Stick them in a 400F oven for about 20 minutes and Bob's your uncle...you've got yourself some Eccles cakes, also known as Banbury cakes, and Chorley cakes, and Hawkshead cakes and Coventry Godcakes...similar cakes, different shapes impostors all as the Eccles cake is the original and that's that!
As you can see above I made myself a nice spot of Kenyan Bop tea, good and strong, and the Eccles cakes were soon a thing only of pleasant memory.
Happy Baking and let me know how you faired...ta ta!