Friday, February 13, 2015

An Earl Grey Possett for your Valentine's perhaps?

A divine Earl Grey Possett...swoon....sigh......
ELIZABETHAN POSSET:
OED definition is: Drink made of hot milk curdled with ale, wine etc (sounds charming....) formerly used much as a remedy for colds. In the Elizabethan era it became the recipe you see below...a more refined pudding in the truest Blighty tradition.

OK I’ve said some of my other desserts/puddings here were simple but this beats them all….4 ingredients (you can even make it 3 if you want to exclude the tea flavouring and just have it as a Lemon Possett) and 3 minutes of cooking and a really impressive and divine dessert results!! Sure to impress your beloved on Valentine’s Day!!

INGREDIENTS:
Makes 4 servings.
 
3 1/2oz/ mounded half cup sugar (I used organic slightly brown sugar but if you want your posset the palest of colours then use white)

1 1/2 cups/12 fl oz heavy/double cream

1 tablespoon of the best, most perfumed Earl Grey tea you can find
(it doesn't have to be Earl Grey - it can be any tea you like but Earl Grey is so romantic!)

3 tablespoons lemon juice (from one lemon) - organic preferably, so you can use the peel for glacee'ing (is that a word?) if you'd like. 

METHOD:
1. Put cream, sugar and tea in a heavy bottomed pan.

2. Warm to just barely boiling

3. Simmer very gently for 3 minutes and stir occasionally to prevent stickage.

4. Strain into a bowl, some flecks of the tea may go through the strainer - that's OK - it looks quite pretty - then gently and slowly whisk in the lemon juice dribble by dribble…be in awe as the mixture starts to thicken - you can stir instead of whisk but as I found when you whisk it gives you a nice bubbly surface on the creams as they set and when served in a teacup look like a frothy cuppa as seen below :)
5. Pour into small, ½ cup containers and allow to cool then pop
into the fridgerdator (tee hee) for about 4 hours until completely set.

6. I still am in awe of how this dessert sets with just the lemon juice.

WHAT a sublimely delicious, smooth, luxurious treat this is....PLEASE do try it sometime.

I embellished mine with candied/glaceed lemon peel:
which is simply a combination of peel, water and sugar:
as I have my wood stove cranked during this period of Arctic bleakness and vast episodes of heavy snow I utilize the heat to make candied/glaceed peel from any and all organic oranges and lemons that come through the house - I simply save the peels and then boil, boil, boil them in a simple syrup of one cup of water to one cup of sugar in a small pan and keep adding water and sugar as I see fit when the mixture reduces down, I let it boil down maybe 4 or 5 times to a thickish syrup then fill again with water - not at all scientific but eventually the peel softens, becomes translucent, tastes really good when you fish out a piece and allow it cool - beware this stuff is screaming hot -  and when the syrup boils down to a bubbly thickness after you decide it is ready - keep your eyes peeled on the pan as if it burns the house will smell for days and you've lost your lovely peel -  then I strain and roll the peel in more sugar and leave on a plate on a shelf above the stove to dry out - doesn't usually get much chance to do so as James and I are both rather fond of this and it disappear quite quickly.
 I save the sugar syrup from the straining in a jar to help start the next batch off in good stead.

In the background of these pics are my fabrics EUROPA and BLUE RHAPSODY - click on the names to go to my online shop - Thank YOU!!!
Meanwhile outside in Maine:
The snow has been piling up....
and the sculpture has been disappearing:

          As of this Valentine's evening we should be seeing yet another 1 or 2 feet of snow arriving and settling on top of the already 4 feet we have right now - I love a good blizzard and can't wait to cosy down and eat my possett!!

HAPPY VALENTINE'S DAY EVERYONE!

Friday, November 21, 2014

Sticky Toffee Pear and Gingerbread Upside Down Cake Pudding!

She may not win any competitions for prettiest cake but she might win some for taste - especially if you're after a sticky, gooey, gingerbready cake with tooth and lusciousness!

If you follow my blog recipes you will know by now how many times I use my sticky toffee pudding sauce in other recipes - it is just fantastic - very simple, easy to make and it goes with or on almost anything sweet - over ice cream, in actually sticky toffee pudding recipes, over steamed puddings and cakes, in apple pies and gallettes - you name it I bet this sauce will improve it!

So make your sticky toffee sauce first:
STICKY TOFFEE SAUCE:

2 1/2oz/ heaped 1/4 cup brown sugar 

 1 1/2 oz / 3 tablespoons salted butter 

 2 tablespoons cream or half and half 

1. Put all three ingredients in a pan to melt together, mix and keep mixing whilst letting it bubble a couple of minutes until it gets a bit thick - allow to cool and then pour into a well buttered cake tin - I always use a 6" round so the cake is small in diameter and taller because of it but you can do an 8" and the cake of course will be shallower and may take a shorter time to bake - so beware of that!!

2. Now slice one good firm pear into about 1/4" slices and arrange on top of the sauce in the bottom of the tin:
 For the cake part: please have your ingredients at room temperature and your oven at 350F to start
5 1/5 ozs/ 1 1/4 cups/ 150 g white flour sifted

1/2 teaspoon bicarb of soda/baking soda

1/2 teaspoon of salt 

1 teaspoon freshly grated nutmeg

 1 teaspoon cardamom 

2 tablespoons of freshly grated ginger root - I was lucky enough to get local Maine ginger and it is gorgeous!

1 egg whisked

2 fluid ounces/ 1/4 cup treacle/molasses 

4 oz/ 1/2 cup/ 125g sugar 

1 fluid ounce/ 1/8 cup  whole milk 

2 1/2 ozs/ 5 tablespoons/60g melted butter 

2oz chopped crystallized ginger 

1/2 a chopped pear
1. Sift all the dry ingredients together (not the pear or ginger) in a medium sized bowl.
2. Mix all the wet ingredients together and blend well.

3. Make a well in the centre of the dry ingredients and pour in the wet and mix together til smooth and even.

4. Add the ginger and chopped pear - mix well til evenly distributed.

5. Dollop batter atop pears and sauce and gently smooth until evenly spread in the pan

6. Cover with parchment to prevent the top burning - I didn't do that at the very beginning and I should have done - my cake top got a little burnt as you can see:
7. Bake at 350F for 30 mins and then lower to 325F for about another half an hour, but check at 15 mins (especially if you used an 8" cake pan) until a toothpick comes out of the cake clean - don't push the toothpick to the bottom of the pan or you'll get sauce on it and think the cake is not done.

8. Leave in the pan for about 10 minutes and then flip onto a plate and watch the sauce flow over the cake and pool around - ahhhhh!!!
If you're really lucky - as I was - the pears will be in tact and stay on the cake neatly when you flip it over!
Allow to cool completely, and if it's possible keep to the next day for the ginger flavour to develop - if you can't wait that long wait as long as you can before devouring!
We had half the day of and the rest the next day - a fair compromise methinks!!
Soft caramelly pears, sticky gooey top to the cake and a toothsome cake gingerbread body - just aching to be eaten with a nice hot cuppa!!!

And may I introduce you to my little buddy Ginger - doesn't this look like a little clown like creature with eyes closed and little eyelashes - such a character - it was hard to eat but I managed!!
Well HAPPY BAKING my friends - please let me know if you make this - it would be a good Thanksgiving dessert - very seasonally appropriate.

You can post your pics on my FACEBOOK PAGE - I'd love to see your cakes!

Thanks, Patricia


Wednesday, November 5, 2014

I wasn't quite expecting this much snow!

So there I was  going to bed round 3am - for I truly am a night owl - on November 1st watching a flake or two falling gaily from the sky amidst rain and sleet and checking the weather forecast which was saying 5 to 8 inches of snow the next day thinking maybe they were wrong. Nope - it appears, as you can see from my pictures, that I was the one who was wrong. I awoke next morning to see a blizzard in full swing ready to turn into a maelstrom of wild winds and accumulating heavy, wet, snowman snow! Luckily I had fired up my camera just before the power went off at noonish November 2nd only to return two days later with the internet not coming on for another 12 hours. It was wild but awfully pretty and very The Lion, the witch and the wardrobe-y.

Here's the storm gearing up:
 and in full swing...
Before the storm began I was worried these last 2 of a very meagre crops of apples wouldn't make it through....
- I should have worried about the trees themselves - two of which lost large limbs but are still standing old and proud. We were lucky as we saw when we drove into town, so many limbs were down and the clean up is still continuing.
The day after the storm was bright and sunny and almost balmy. 
the roads were perfectly clear and it was so strange to see so many trees still with leaves and colour against the snow
Luckily we had our sturdy old wood stove to keep us warm and toasty, she heated the house and provided a way to cook for the couple of days we were without power.
Maybe winter is already over?

Sunday, October 19, 2014

The pretty Autumn fields of Maine

A glowing vignette
 We have had a recent run of absolutely beautiful temperate weather here in Maine. The day time temperatures have been as high as 74F and it has been so very pleasant being outdoors enjoying the last vestiges of the summer like weather. Plus it made taking in the wood to keep us warm this coming winter so much easier to achieve.

But the autumn/fall in Maine is not just about the brilliant colours of red, orange and yellow but also the lovely muted, antique, dreamlike russets, greyed whites, pale yellows and dark tracery of naked branches and veins on the leaves.
Ghostly white leaves - pretty against the backdrop of russets
Checkerboard leaves - lovely colours - I wonder what they are?
I love the tumble and tumult of the speckled, sprinkly fields


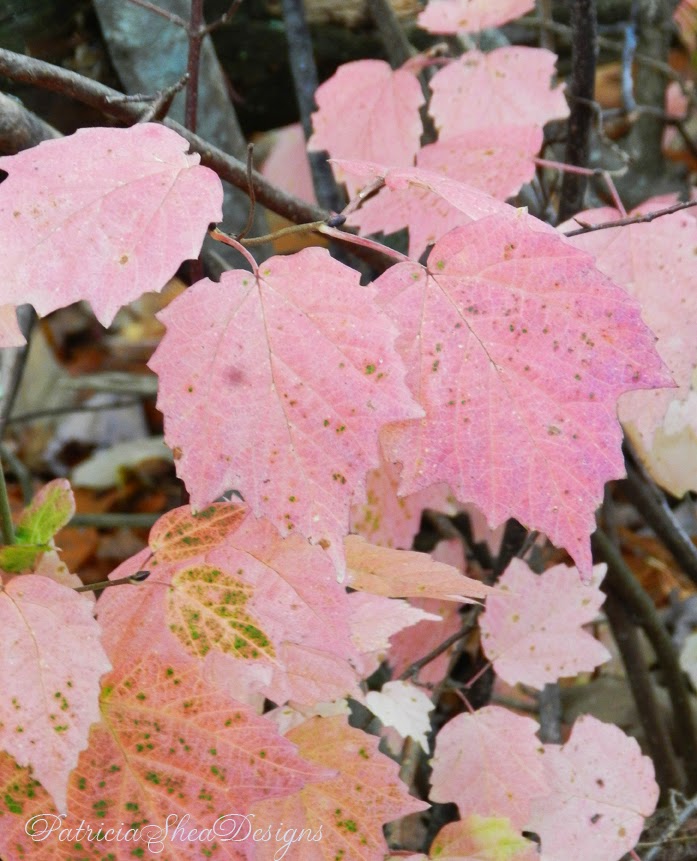
 And of course we cannot leave out the young maple leaves that turn such a pretty, almost ghostly pink....

 I leave you though with some of the glowing autumn colours we think of when we think of "Fall in New England"


I hope you are enjoying your season of mists and mellow fruitfulness!
Next up on my blog will be a luscious, sticky, stodgy Pear and Ginger Cake that just screams out for lashings of custard.

STAY TUNED and please consider following me on
Follow on Bloglovin 

Thursday, October 9, 2014

Prune, Ginger and Lemon Teacake and a new pink design at Society6

Ahhhh - lovely, delicious, delightful Prune, Ginger and Lemon Teacake - what a wholesome and satisfying treat on a cosy autumn day. The poor beleaguered fruit known as 'prune' is a star in this tangy, spicy sweet, fruit cake - I love prunes and always wonder why they have such a bad reputation - maybe 'they' are on to something by trying to change the name to dried plums?

If you are a fan of light fruit cakes then get thee to the kitchen pronto, and best to have all your ingredients at room temp!

This recipe is for my usual 6 inch cake - you can double for a 9" pan but will have to bake longer and check more often for 'doneness'
First you must start by soaking your prunes in good strong tea - I use Earl Grey for that extra lovely, flowery bergamot flavour - but use whichever tea you like.

5 ounces of prunes chopped into 1/2 inch chunks - don't chop too fine or they will turn to mush in the hot tea.

4 fluid ounces strong tea 

1. Put the two together in a small saucepan and heat through 'til almost bubbling for a few minutes - maybe three - then allow to cool completely

Pre heat the oven to 350F, butter and line with parchment paper a small, tall 6" diameter baking pan lightly rebutter the parchment after lining the pan. 
INGREDIENTS:
5oz white flour/ 1 1/4 cups with 1/2 teaspoon baking soda whisked in 

2oz/ 1/2 stick salted butter
I always use salted but you can use unsalted if you prefer

3oz chopped crystallized ginger

2 tablespoons freshly grated ginger

2 tablespoons freshly chopped lemon zest - chopped works better in this recipe better than grated - the slight tooth gives an added dimension

4 oz / slightly mounded half cup sugar

1 egg lightly beaten

1. Cream butter and sugar 'til light and fluffy .

2. Add egg in three goes and beat each time to incorporate fully.

3. Fold flour and baking soda in in two goes until well blended and smooth.

4. Fold in the prunes with tea, blend, fold in the lemon zest and two gingers and blend.
5. Dollop the thick batter into your prepared pan and smooth over.

6. Pop into the pre heated oven and bake for 45 mins, then add a parchment or foil hat over the cake to stop it from burning and bake for another 30 mins checking at 15 mins for doneness with a toothpick which should come out of the cake clean after being deftly plunged into the centre of the cake. When the toothpick comes out clean your cake is done.

Mine did sink a little in the middle after it came out of the oven but it was fine - not sticky in the middle at all.
Allow the cake to cool for about 15 mins before removing from the pan to a cooling rack - allow to cool completely before eating.

This is definitely one of those improves with age cakes so if you can wait til the second day the flavours will have married to a point of complete perfection.

Get the kettle on!!!

If you are interested in the watercolour blue and white gingham fabric pictured above you can find it in my Spoonflower shop HERE
and the Homespun Patchwork design - in fabric, wallpaper and wrapping paper too, is available HERE

Usually I flip flop my posts between design and recipes but this time I am combining the two.

My latest design to be added to my print on demand online Society6 shop, I give you Country Days Patchwork on Pink - if you know my work you know how much I love the colour pink :)
To this design in my Society6 shop HERE
I don't know why I love painting patchwork designs in watercolour but I do, there's something very satisfying about it for me. I originally created the motifs in this design for a competition at Spoonflower - here is a LINK to that design in a different format.

And here is my new design on various items in my shop with links below to the individual product:
To the iPhone (including iPhone6) and Samsung Galaxy cases click HERE
To the Country Days on Pink mug HERE
To the shower curtain HERE
To the Country Days Patchwork on Pink tote bag HERE
I hope you are having a wonderful Fall/Autumn thus far - we have had some glorious days in Maine and I do hope they continue for a while longer. If you bake my cake please feel free to be in touch and let me know how it came out - you can post pics of such on my Facebook page HERE

Never miss another post - not that I post that often - by following me at Bloglovin - click the button below and receive all my new posts to your inbox - thanks!!
Follow on Bloglovin